This is an overview and tutorial of how to create desktop programs for Linux, Mac and Windows using NW.js.
NW.js is a framework for building desktop applications with HTML, CSS, and JavaScript. It works by combining a JavaScript app with Node.js and Google’s Chromium browser engine into a single desktop program.
I’m a frontend developer with little experience in creating desktop applications and installers, so it took me some time find all the details of how to set everything up. This tutorial is an overview of my findings. I hope it can help you to get started using NW.js and to create desktop programs and installers. I’ve written this tutorial using MacOS 10.14 (Mojave), Ubuntu 18.04 and Windows 10.
NW.js instead or Electron
Electron is the better known of the frameworks for creating native applications. I also found it easier to use. My app however relies on requestAnimationFrame for timing, and I couldn’t use Electron because of an issue in Chromium (the timer stops when the app window is hidden).In the end however NW.js is not that hard to use.
The ‘Metronome’ project
The app for this tutorial is a simple metronome. Useful for for musical timekeeping. It uses requestAnimationFrame and it generates sound, so it will be easy to demonstrate that with NW.js the requestAnimationFrame timer will keep going even if the app’s window is hidden behind others. See a demo of the app here: https://hisschemoller.github.io/nwjs-tutorial/src/.
Tutorial overview
There’s quite a lot to go through, so here’s an overview of what’s included in this tutorial:
- Project setup to run it in the browser
- Run NW.js directly from the command line
- Create a Mac desktop program (.app file)
- Create a Linux desktop program
- Create a Windows desktop program (.exe file)
- Create a Mac installer (.dmg file)
- Create a Linux installer (.deb file)
- Create a Windows installer (.exe file)
Project setup to run it in the browser
Clone the Git repository for the tutorial at https://github.com/hisschemoller/nwjs-tutorial.
Install the dependencies as usual and start as defined in package.json.
yarn install
yarn start
The app will now be available at http://localhost:3000
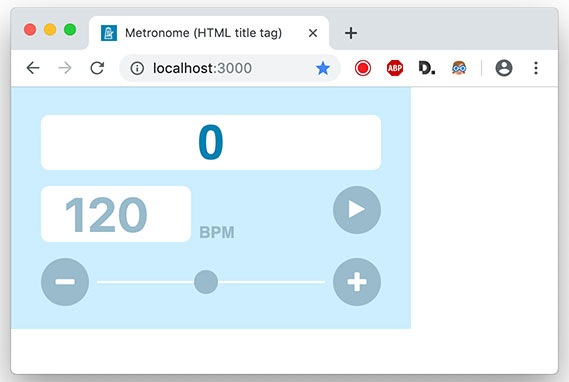
Open the URL in a browser and you’ll see a small counter display. Click the Play button. The counter increases and a short blip sounds at each counter increase.
Note that the metronome stops if you switch to another browser tab, or if the browser is completely hidden by other windows.
Run NW.js directly from the command line
During development an app can easily be tested within the NW framework from the command line. To set this up requires just a few steps:
- Add the NW package as a dependency using NPM
- Create a manifest file
- Run the app in the NW framework
Add the NW package as a dependency using NPM
Two flavors of NW exist: For development purposes there’s an SDK version which contains the Chrome developer tools. The regular version lacks the developer tools and because of that results in a smaller file size. To use the SDK version add -sdk to the version string.
Add NW as a devDependency inpackage.json.
"devDependencies": {

  "nw": "0.38.0-sdk"
}
Create a manifest file
NW needs a manifest file to run. The manifest file is a JSON file called package.json. So confusingly it’s named exactly the same as NPM’s package.json. The difference however is that the manifest file is located in the same directory as the app’s source files, while NPM’s package.json is at the root of the project.
+-- nwjs-tutorial
|   +-- package.json (NPM)
|   +-- src
|   |   +-- index.html
|   |   +-- package.json (NW manifest file)
As a bare minimum the manifest just needs the fields name and main for NW to run. The main field points NW to the app’s entry point, which in this case is index.html.
A lot more settings are possible however. a reference of all available options can be found in the NWjs Manifest Format Reference
This is the manifest for the Metronome app:
{
  "name": "Metronome_manifest_name",
  "description": "A metronome app to keep time.",
  "main": "index.html",
  "chromium-args": "--disable-raf-throttling",
  "window": {
    "icon": "img/icon.png",
    "height": 240,
    "resizable": false,
    "width": 400,
    "title": "Metronome_manifest_window_title"
  }
}
Run the app in the NW framework
I’ve added a script in package.json to run NW, but it could as easily be started by just typing yarn nw in the command line.
"scripts": {

  "start-nw": "nw --disable-raf-throttling"
},
Once started, NW looks for the "main" field in package.json to find the app’s entry point, and looks for the manifest file in the same directory as the entry point. It then has all the data it needs to run the app.
Try running NW with and without the --disable-raf-throttling command line option and notice that with the option the metronome keeps running when the app is hidden.
Creating a desktop program with NW.js
To create a desktop program a build of NW can be downloaded from the nwjs.io download page at https://nwjs.io/downloads/. Builds are available in different flavors, for Mac, Linux and Windows, 32 or 64 bit, with or without the SDK option.

In general to create a desktop program you will add the project’s source files to the downloaded NW build, and the resulting package is the program to distribute. There are differences however between Mac, Linux and Windows. NW.js has it’s own documentation here.
Create a Mac desktop program (.app file)
- Download a Mac release from https://nwjs.io/downloads/ and unzip the download. The unzipped folder contains the file
nwjs.app(among others). - Package all the files from the project’s
/srcdirectory into a zip file and rename the zip toapp.nw. So, to be clear, the file extension will be.nwinstead of.zip, and it will containindex.html, thecss,jsandfontsdirectories and thepackage.jsonmanifest file. - Put
app.nwinside the downloaded Mac release, in thenwjs.app/Contents/Resources/directory. (right click on nwjs.app and choose ‘Show Package Contents’ to open it) - To add the app icons, rename
/assets/icons/metronome.icnstoapp.icnsand paste it intonwjs.app/Contents/Resources/. The file must replace the existing default icons. See below to create an.icnsfile. - Also overwrite
nwjs.app/Contents/Resources/documents.icnswith the.icnsfile.

The file nwjs.app is now an executable that runs the app. It’s the only file you need, you can delete all the other files in the download. Rename the file to Metronome.app. Double click to run it.
Mac .icns file
On a Mac you can create an .icns file with the iconutil command line utility. Here are two tutorials:
- https://retifrav.github.io/blog/2018/10/09/macos-convert-png-to-icns/
- https://elliotekj.com/2014/05/27/how-to-create-high-resolution-icns-files/
On MacOS Mojave I created the icon files as described in the first tutorial and ran iconutil as described in the second one. That worked. A general overview of the steps:
- Create all the required
pngimages. (For this tutorial they’re inassets/icons/metronome.iconset). - Put all files in a folder and rename the folder so the name ends with
.iconset. In this casemetronome.iconset. - Start Terminal and
cdto the directory where the.iconsetis. - Run
iconutilto generate the.icnsfile, like this:
iconutil -c icns metronome.iconset
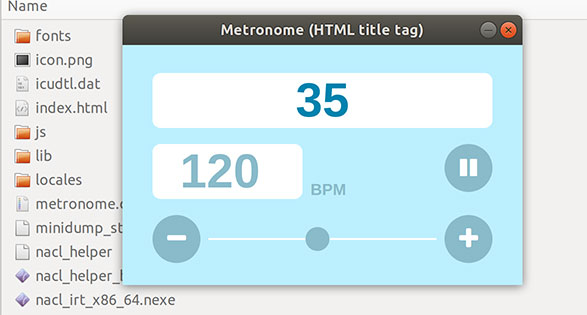
Create a Linux desktop program
I have tested this on Ubuntu 18.04, but I don’t know in how far the process is different in other Linux distributions.
- Download a Linux 32 or 64 bit release from https://nwjs.io/downloads/ and unzip the download.
- Copy all files in the
/srcdirectory of the project into the root directory on the downloaded package. In my case it’s callednwjs-sdk-v0.38.0-linux-x64. So your source files andpackage.jsonmanifest file will share the same directory with thenwfile in the download. - Copy the
/metronome.desktopfile to the same root directory as the source files and manifest. See below for creating a.desktopfile.
Linux .desktop file
In GNOME and other freedesktop.org-compliant desktops, an application gets registered into the desktop’s menus through a desktop entry, which is a text file with .desktop extension. This desktop file contains a listing of the configurations for your program.
- The file should have a unique descriptive filename without spaces. For this project I use
metronone.desktop. - The location should be:
/usr/share/applications directoryto be accessible by everyone or/.local/share/applicationsto be accessible to a single user.
Desktop file resources:
- https://wiki.archlinux.org/index.php/Desktop_entries
- https://developer.gnome.org/integration-guide/stable/desktop-files.html.en
- https://specifications.freedesktop.org/desktop-entry-spec/desktop-entry-spec-latest.html
Manually install on Linux
Download a Linux package and copy the source files, manifest and icon file as in the steps of ‘Create a Linux desktop program’ above.
- Rename the package to metronome.
- Copy the package to the
/optdirectory. - Copy the
metronome.desktopfile to/usr/share/applications.
To copy to the source files directory and the desktop file use the cp command with administrator rights in a terminal:
$ sudo cp -r /path/to/metronome /opt
$ sudo cp /path/to/metronome.desktop /usr/share/applications
You will now be able to find and run the app just like any program you’ve installed. No restart or anything needed.
Create a Windows desktop program (.exe file)
- Download a Windows 32 or 64 bit release from https://nwjs.io/downloads/ and unzip the download.
- Copy all files in the
/srcdirectory of the project into the root directory on the downloaded package. Your source files andpackage.jsonmanifest file should be in the same directory as thenw.exefile. - The icon for nw.exe can be replaced with tools like Resource Hacker, nw-builder and node-winresourcer. (See below for Resource Hacker instructions.)
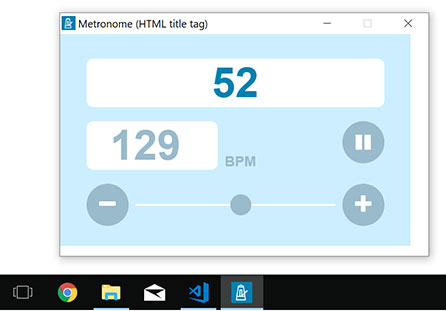
Double click nw.exe to run the app.
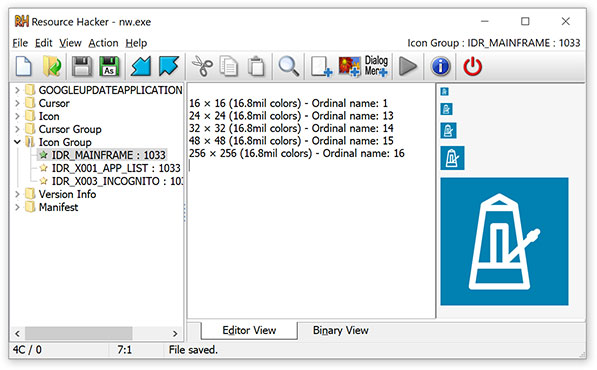
Change the program’s icon with Resource Hacker
Windows uses icons of the .ico file type. Online converters exist that can generate an .ico file from another image type. For example ICOConvert at https://icoconvert.com/.
- Download Resource Hacker from http://angusj.com/resourcehacker/ and install.
- Start the Resource Hacker program.
- Select File > Open… and select the nw.exe
- In the left pane right-click the Icon folder and select Replace Icon…
- Click ‘Open file with new icon…’ and select the assets/icons/metronome.ico file.
- In the right pane select the icon to be replaced, usually the top one in the list.
- Click the Replace button.
- Click File > Save… to save the executable with the new icon.
- Rename nw.exe to ‘metronome.exe’.
More about Resource Hacker:
- http://angusj.com/resourcehacker/
- https://www.howtogeek.com/75983/stupid-geek-tricks-how-to-modify-the-icon-of-an-.exe-file/
Installers
Create a Mac installer (.dmg file)
I’ve divided this section into two parts. The first is to create a reusable nice looking template for the installer that shows the app and a shortcut to Applications so users can easily add the app to the Applications directory.
The second part is the creation of the actual installer.
Create a template
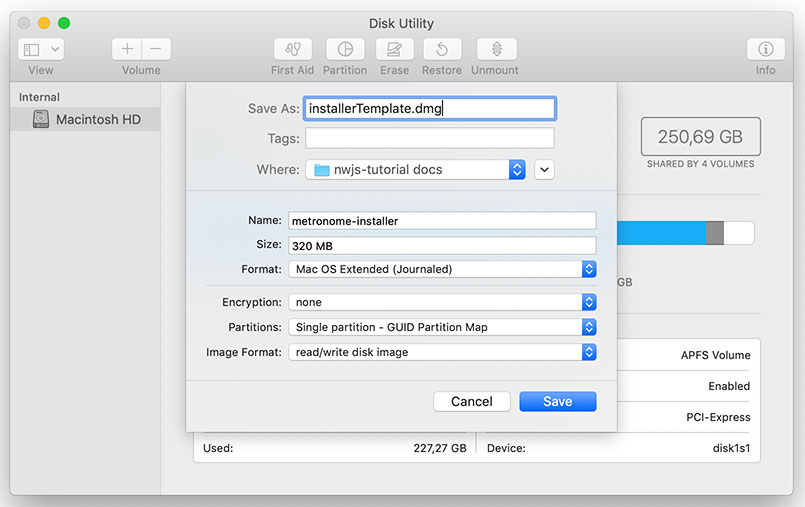
- Start Disk Utility.
- Go to File > New Image > Blank Image…
- Set the file name of the the image to
installerTemplate.dmg. - Choose a destination folder where to save the installer.
- Name the image ‘metronome-installer’.
- Select a size that’s enough for the size of the app, 320MB.
- Leave the other fields as they are.
- Click ‘Save’ to create the dmg file.
- Double click
installerTemplate.dmgto open it. It will show up in finder as a device. - In the Finder menu choose View > Show View Options.
- Customize the look of the folder. Set it to Icon View, larger icons etc.
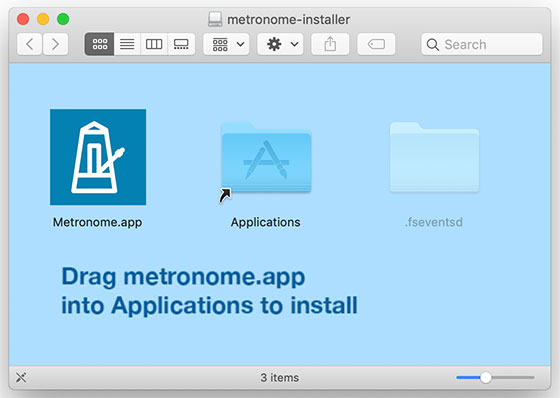
- Copy
metronome.appfile into the folder. - Copy a shortcut to
Applicationsinto the folder. - Organize the icons within the folder.
- Optionally make a background image for the folder that tells users to drag metronome.app into Applications. (Find it in
/assets/mac/mac-installer-background.jpg.) - Eject the disk image.
Build the final DMG
- Start Disk Utility again.
- Choose Images > Convert… from the menu.
- Select
installerTemplate.dmgjust created. - Enter the name of the final image,
metronome-installer_1.0.dmg. - Select Compressed as the Image Format.
- Click ‘Save’ to create the dmg file.
DMG creation resources:
- https://kb.parallels.com/en/123895
- https://www.renedohmen.nl/blog/2012/04/building-fancy-dmg-images-on-mac-os-x/
Create a Linux installer (.deb file)
I’ve used an easy to follow tutorial here: https://ubuntuforums.org/showthread.php?t=910717.
- Create a file named
controlwith information for package management tools likedpkgto manage the package. I’ve already added the file for this project in/assets/linux/. - Create a directory for the files to install that uses the naming convention
<project>_<major version>.<minor version>-<package revision>. So here that’smetronome-installer_1.0. - Inside the folder create a file structure that represents the locations of the files to install. Just as in the manual install described above. See the example below.
- Create the
debinstaller withdpkg-deb --build metronome-installer_1.0.
This is the directory and file structure:
+-- metronome-installer_1.0
|   +-- DEBIAN
|   |   +-- control
|   +-- usr
|   |   +-- share
|   |   |   +-- applications
|   |   |   |   +-- metronome.desktop
|   +-- opt
|   |   +-- metronome
|   |   |   +-- nw
|   |   |   +-- index.html
|   |   |   +-- package.json
|   |   |   +-- ... (and all the other files of the application)
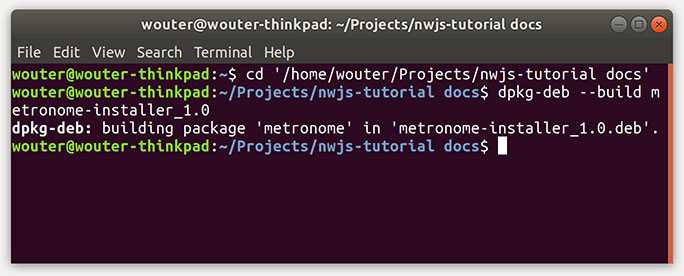
As mentioned, create the .deb file with:
dpkg-deb --build metronome-installer_1.0
The result is a file named metronome-installer_1.0.deb. The Metronome app can then be installed with:
sudo dpkg -i metronome-installer_1.0.deb
Another deb installer tutorial:
- https://ubuntuforums.org/showthread.php?t=910717
Create a Windows installer (.exe file)
INNO Setup is voted best here at Slant. So that’s what I decided to use.
- Download Inno Setup from http://www.jrsoftware.org/isdl.php (The current version is innosetup-5.6.1.exe)
- Install Inno Setup as usual for Windows applications.
- Launch Inno Setup.
- In the Welcome window select to “Create a new script file using the Script Wizard”.
- The wizard opens with the Application Information screen:
- The name of the application (Application name),
- its version (Application version),
- the company (or person) owner (Application publisher)
- the website of the application (Application website).
- Then click on next.
- Next is the Application Folder screen;
- keep the destination base folder at “Program Files folder”.
- application folder name “Metronome”
- Application Files
- For “Application main executable file” browse to
metronome.exe. - For “Other application files” choose “Add Folder…” and select the whole downloaded package with the source files and manifest file.
- For “Application main executable file” browse to
- Application Shortcuts
- Select the shortcuts you want to have created.
- Application Icons
- “Start Menu folder name application”: “Metronome”
- Application Documentation
- For “License file” choose the project’s
/LICENSEfile. - Leave the other fields blank for this project.
- For “License file” choose the project’s
- Setup Languages
- Leave it at English, or select the languages you want.
- Compiler Settings
- For “Custom compiler output folder” choose some directory where to save the installer that will be created.
- For “Compiler output base file name” use “metronome_${version}”.
- For ‘Custom Setup icon file’ select the
metronome.icofile. This must be an.icoagain. - Leave the ‘Setup password’ blank.
- Inno Setup preprocessor
- Leave the Checkbox marked.
- Click ‘Finish’.
- Inno Setup Compiler
- Click ‘Yes’ to compile the new script.
- Agree to save the Setup script so you can compile the installer in the future without having to go through this wizard again.
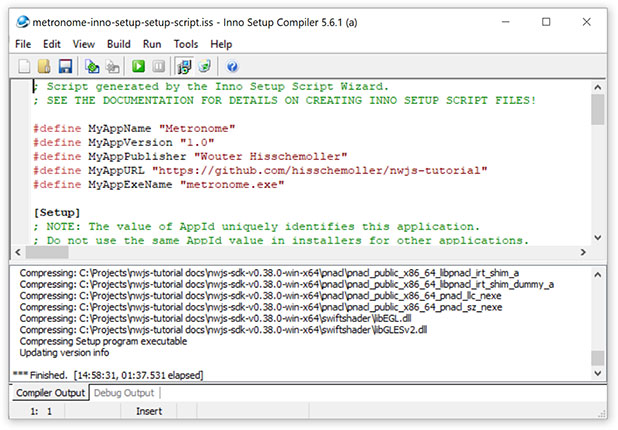
The compiler will take a bit of time to create the installer, but you’ll be able to follow the process in the ‘Compiler Output’ pane of Inno Setup.
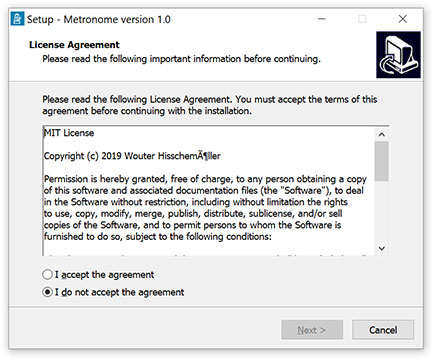
The resulting installer is an .exe file that presents users with the installation procedure they’re familiar with.
INNO Setup resources:
- http://www.jrsoftware.org/isinfo.php
- https://www.supinfo.com/articles/single/7176-create-installer-with-inno-setup
And finally, some other articles that I’ve read to get familiar with NW.js:
- https://dzone.com/articles/what-is-nwjs
- http://docs.nwjs.io/en/latest/For%20Users/Package%20and%20Distribute/
- https://www.sitepoint.com/cross-platform-desktop-app-nw-js/
- https://strongloop.com/strongblog/creating-desktop-applications-with-node-webkit/
- https://github.com/nwjs/nw.js/wiki/how-to-package-and-distribute-your-apps